> For the complete documentation index, see [llms.txt](https://docs.pascom.net/llms.txt). Markdown versions of documentation pages are available by appending `.md` to page URLs; this page is available as [Markdown](https://docs.pascom.net/en/integrations/connector/contacts-microsoft-365.md).
# Microsoft 365 Contacts Connector
Integrate your Microsoft 365 contacts into your PASCOM cloud phone system.
## Overview
The PASCOM Microsoft 365 connector profile allows you to add both public and personal Microsoft 365 phonebooks to the PASCOM phonebook. The synchronisation is performed as an automated server-based synchronisation.
## Import contacts into the PASCOM company phonebook
To create a new connector profile, log into your PASCOM cloud phone system web UI and using the menu, navigate to **Settings** > **Connector** > **Add**.
Next, search for and click on the **Microsoft 365 Contacts** template. This will open the connector profile initial configuration screen in which you have to enter a name for your MS365 contacts connector profile. To move to the next step, click the **Save** button.
### Setup Your MS365 Contacts Connector Profile
If you are following this guide from start to finish, then you will already be at the right screen. However, if you saved your settings in the previous step and are coming back at a later point, you will need to select your connector profile from the list and click **Edit**. this will now direct you to the connector settings.

Configuring and/or editing the connection to MS365 is done under the "Basic Data" tab.
| Field | Description |
| ----------------------------------------------- | ------------------------------------------------------------------------------------------------------------------------------------------------------------------------------------------------------------------------------------------------------------------------------------------------------------------------------------------------------------------------------------------- |
| **Title** | Connector profile name |
| **Mode** |
Create and update records. Remove missing records from previous imports.: (default setting) Imports new phonebook entries, updated entries are compared and updated. Missing are removed from the PASCOM phonebook. Create and update records: Imports new phonebook entries and compares updated entries. No entries will be removed.
|
| **Automation** | Automate connector imports |
| **Authenticate** | Connect to your Microsoft 365 Account |
| **Additionally sync private phonebook entries** | Additional import for importing a user's private contacts |
| **Directories for public phonebook sync** | Select the directories that you wish to import into your PASCOM company phonebook. |
| **Filter group** | If you only want to import contacts from users who are members of a Microsoft group, e.g. “Retail”. |
### Authentication with Microsoft Account
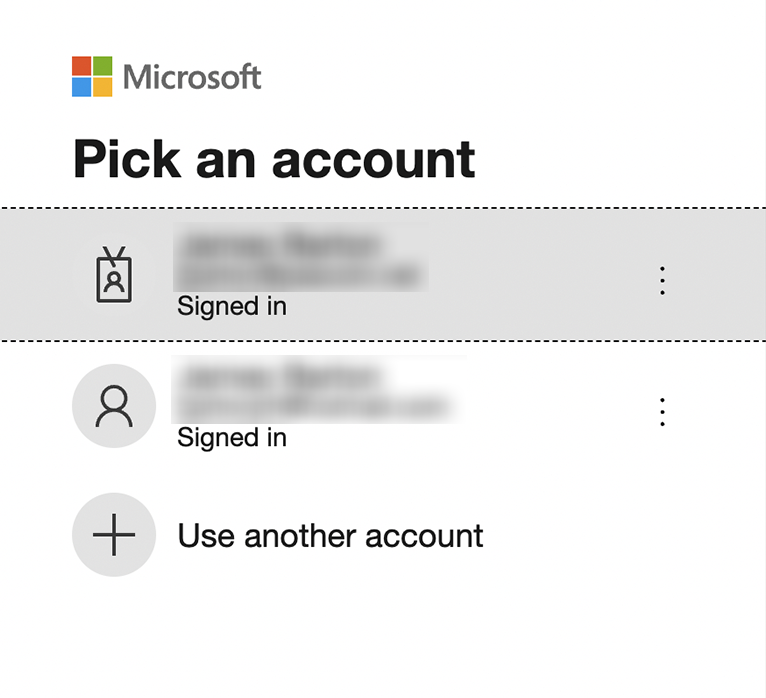
In order for the PASCOM connector to import your Microsoft Office 365 contacts, you must first authenticate yourself with your Microsoft account. To do this, use the **"click here"** link listed next to the Authenticate field. You will then be redirected to the Microsoft login screen.
Next, you will need to confirm the authorisation request in order to provide the PASCOM cloud phone system with access to your MS376 contacts. Once done, the PASCOM cloud phone system will have been successfully connected to your Microsoft 365.
### Select Directories for Import
Click on the **"Select"** link to select the directories you would like to import into your company's PASCOM phonebook.

### Simulate and Perform Import
By clicking on **Save and simulate**, you can perform a test import which will return the first 500 data records.
If you are happy with the simulated import results, you can now perform the full data import by clicking **Action** > **Import Now**.
### Further Customise the Connector Profile
In the connector profile settings, you can modify the field assignment according to match your requirements **Variables** and **Structure** menu tabs. This allows you to import any additional contact data values that you may require.
How the variable assignment works and how you can edit them is explained in the following guides:
[Variables Assignment](/en/integrations/connector/variables-assignment.md)
[Variables Structures](/en/integrations/connector/variables-structure.md)
### Import Users' Personal Contacts into their Private Phonebook
With each data import, the PASCOM Microsoft 365 connector profile can also simultaneously import a user's personal contacts and add them to the user's private PASCOM phonebook.
**Requirments**
1. Each user must have the same username for both the PASCOM cloud phone system and MS 365.
**Example:**
1. PASCOM Username: **joeblogs**
2. 365 Account: ****
**Method**
Go to your MS365 connect profile settings and select the **Basic data** tab. Under the **"Additionally sync private phonebook entries"** option **Yes** from the dropdown list in order to enable the private contacts synchronisation function.
---
# Agent Instructions
This documentation is published with GitBook. GitBook is the documentation platform designed so that both humans and AI agents can read, navigate, and reason over technical content effectively. Learn more at gitbook.com.
## Querying This Documentation
If you need additional information that is not directly available in this page, you can query the documentation dynamically by asking a question.
Perform an HTTP GET request on the following URL with the `ask` and `goal` query parameters:
```
GET https://docs.pascom.net/en/integrations/connector/contacts-microsoft-365.md?ask=&goal=
```
`ask` is the immediate question: it should be specific, self-contained, and written in natural language.
`goal` is what the user is ultimately trying to achieve, the reason they need the answer. Sharing it helps GitBook give you a better, more relevant answer. A goal is most helpful when it describes the outcome the user wants rather than restating the question. For example, with `ask=how do I create an API token`, a goal like `build a script that syncs our docs to a CMS` lets GitBook tailor the answer to that use case.
The response will contain a direct answer to the question and relevant excerpts and sources from the documentation.
Use this mechanism when the answer is not explicitly present in the current page, you need clarification or additional context, or you want to retrieve related documentation sections.